
What is needle painting?
Needle painting is a hand embroidery technique where stitches are laid close together to fill in areas of a motif, blend colors and achieve realistic shading.
The designs on Japanese kimonos and Chinese silk are exquisite examples of the effects this technique can achieve.
What you need
To get started with silk embroidery, you will need
And, of course, the raw nerve to try something new. If you're just getting started, you can expect to make a mistake here and there. But you've got to crack a few eggs to make an omelette, right? So here we go!
Ground fabric for embroidery
The best fabric for embroidery is a sturdy, densely woven and smooth fabric. Beginners especially should avoid stretchy or sheer fabrics. Heavy linen or cotton in a plain or twill weave is a good choice. If you want to use silk, try smooth dupioni, duchesse, or organza, which is nice and stiff in spite of being sheer.
Sewers with weak eyesight and those with less experience should choose a matte fabric in a color that contrasts with the embroidered motif. Dark-on-dark patterns are more demanding.
When you have some experience under your belt, you can branch out to more lively embroidery fabrics, like silk satin – try experimenting first with scraps from your sewing stash.
Silk floss
The main player in any embroidery project is, of course, the floss, in this case we're using smooth, flat silk floss.
Genuine silk floss turns out the finest, most perfect results. The masters of Chinese and Japanese embroidery used just this material.
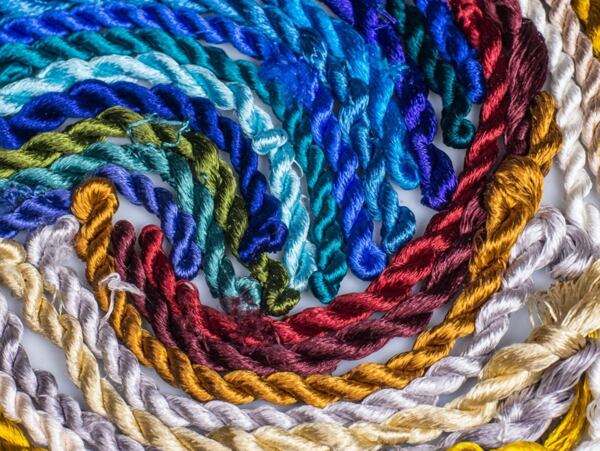
Silk floss comes in both twisted and flat (non-twisted) versions. Flat silk floss is made of a single thread of spun silk. Twisted silk floss is made of two or more threads and is similar in appearance to sewing thread.


The photo above shows, from left to right: Flat embroidery silk from Sartor, twisted silk Madeira, and cotton embroidery floss Mouliné from DMC.
For the Madeira and DMC floss shown, each strand is made of two twisted threads and wound into skeins of four or six strands each. When doing needlework, only one or two strands are generally used at a time. Flat silk is typically used as a whole, although it may be split for use in fine details.
Where to get real silk floss
You can get flat embroidery floss made of genuine mulberry silk, the traditional material used for the needle painting technique, here at Sartor. Look in the notions section under embroidery (while you're there, check out the Japanese Sashiko thread too).
Other sources for embroidery silk are Madeira (twisted floss only) and Au Ver à Soie (their soie ovale is top quality flat silk floss, but it comes at a premium price).
You can order embroidery silk directly from China, but here you may run the risk of ending up with artificial fiber. In many parts of the world the terms silk and even natural silk are bandied about for all kinds of rayon and polyester.

If you want to dabble in needle painting at home without investing in silk floss, there are a few alternatives available, though not all are entirely suitable.
Types of floss to avoid
The rayon thread sold for embroidery machines, though it has a nice gloss, is not at all suitable for needle painting.
Even the popular rayon hand-embroidery floss from DMC and Anchor are poorly suited for this purpose. They are just too stiff and lack the pliancy required for needle painting .
Good alternatives
For needle painting a suitable alternative to silk is the cotton embroidery floss mouline from DMC, Anchor, and others. You are likely to have some on hand if you've done any embroidery in the past, and they're easy to work with; of course cotton floss lacks the sheen and suppleness of silk.

Finding a template
You can sketch a design yourself, trace an illustration or photograph, or find a template online. To start with, try a small, simple motif. A single flower with a bit of shading is ideal, and that is the project we'll be tackling here.
Needles and hoop
Get some classic, sharp embroidery needles – any brand is fine as long as they are labeled for embroidery.
You'll also need an embroidery frame or hoop. The more firmly the fabric is held in place, the less it will pucker as you work. While a hoop does not stretch the fabric as perfectly as a frame can, it is great for smaller pieces and is perfect for this project.
Get a wooden embroidery hoop with a diameter of 6 to 8 inches (15–20 cm). To keep the fabric from slipping, it's a good trick to bind the hoop in fabric. I enclosed both hoops in a strip of cotton bias tape (available in any fabric store).

embroidery tutorial steps
Before you start stitching, get everything ready:
Trace the template onto fabric
If you have chosen a light-colored fabric, tracing your template will be simple. Print out your design (if you don't already have it on paper), lay the fabric on top, light it from below, and trace.
You can use a special light board for this purpose (you can pick up a basic LED light board for around $20), use your phone or tablet, or trace your design against a sunny window.

For dark fabric, transfer your template using transfer paper or coat the back of your design paper with chalk and trace to the fabric.
Trace with a colored pencil or white gel pen. Do not use an ordinary pencil; the graphite can come off on the finished product.

Place fabric in the hoop
Loosen the screw and take the two hoops apart. Stretch the fabric over the inner hoop, fit the outer hoop snugly in place, and tighten.
If the fabric is not taut enough, don't try to fix it by tugging at the edges – you'll stretch it out of shape. Take the hoop apart and try again.
A small hoop is easy to hold in your hands; a larger one may require a stand or a table to prop it up. You can also use a scrap of cloth to protect the fabric around the edge of the hoop from getting soiled.
Prepare the silk floss
If your floss is in skeins, you have to get it ready before you sit down to work.
- Unwind the skein – Our embroidery floss conceals two smaller skeins. Separate them.
- Find the spot where the skein is tied – The two ends of the floss are tied in a knot here. Untie or snip apart.
- At the spot where the skein was tied together, cut all the way through – This will give you a bundle of strands of equal length.
Another option is to wind the whole skein onto a spool, but that is tedious work and the floss can be easily damaged or soiled.


File your nails
Seriously now, silk floss can get caught on a rough fingernail or hangnail. So before you sit down to embroider, give your hands a little tender loving care; you'll thank yourself later.
How to store embroidery silk
A little embroidering hack that simplifies handling your floss and keeps it from tangling, is to make a floss organizer by punching holes in a bit of cardboard (a bookmark, an old greeting card, whatever). Then loop each bundle of thread through a hole and braid it loosely. Floss is satiny smooth, so you can pull a strand right out without even undoing the braid.

embroidery stitches
Thread painting requires mastery of a few basic embroidery stitches:
- Stem stitch
- Satin stitch
- Chain stitch
- Split stitch
Flat silk floss really shines in areas worked with a satin stitch – straight stitches laid down side by side. For shading, short and long stitches are alternated, which makes the colors blend more smoothly.
Choosing colors
Choose colors based on your source image or use your imagination. If you want to try shading, you will need multiple shades of each color.
For the example in this tutorial, I worked with a palette of four shades of green and five reds, plus two shades of yellow for the center of the flower.


Where to start
Embroidery is always done from the bottom up – if one part of the design overlaps another, start with the part that goes underneath. For the rose in this example, I embroidered the bud first, then its leaves, the leaves around the rose, the rose petals, and finally the center of the flower.
Tidy edges
Sewing around each part with a split stitch first helps make the edges nice and tidy.
When sewing around the contours like this, the same rule applies – work from the bottom up, doing each part in its turn.
Secure the beginning of the thread with a few stitches under a finished part; don't use a knot! If there is nothing to tuck your thread under, secure it with a small back stitch in a spot that will later be covered by embroidery or leave a longish end free on the reverse and tuck it in later.


Filling and shading
From here it's a little like a kid with a coloring book. Fill in each part with stitches laid side by side. Start filling in the area near the edge, bringing up the needle inside of the area and sticking it back in just beyond the edging contour.


When you get to the central part of the design (once the border areas are done), the direction reverses: Bring up the needle among the completed filling stitches and stick it back in more towards the center of the space you are coloring in.


If you want to achieve a shaded effect, use long and short stitches. Alternate the stitch length so that the border between the two shades is not straight, but nuanced.
For the next shade – darker or lighter – do the same. Alternate long and short stitches so that the shades blend naturally.

Fill in the flower with stitches of various lengths.

After finishing the flower petals, I filled the middle with little French knots, but you could also fill this area with a chain stitch, a stem stitch in the shape of a spiral, or shading – whatever strikes your fancy.

Photo sources: [1] Victoria and Albert Museum, [2] [3] Wikimedia Commons; [4] Metropolitan Museum of Art


Comments(1)